
12 Ways to Protect Your Privacy and Prevent Data Leaks on Windows
Your Windows computer can share more information than you expect. A weather app may ask for your location. A website may remember which pages you visit. A program you installed months ago may still have access to your camera or files.
Not all of this amounts to a data breach. Some information helps apps work. Other details support advertising or follow you around the web. The problem starts when you lose track of what your computer shares and who can see it.
You don’t need to stop using your favorite apps to improve your privacy. A few changes to Windows settings, your browser, and the way you connect to the internet can reduce unwanted exposure. This guide focuses on Windows 11 and points out settings you can check yourself.
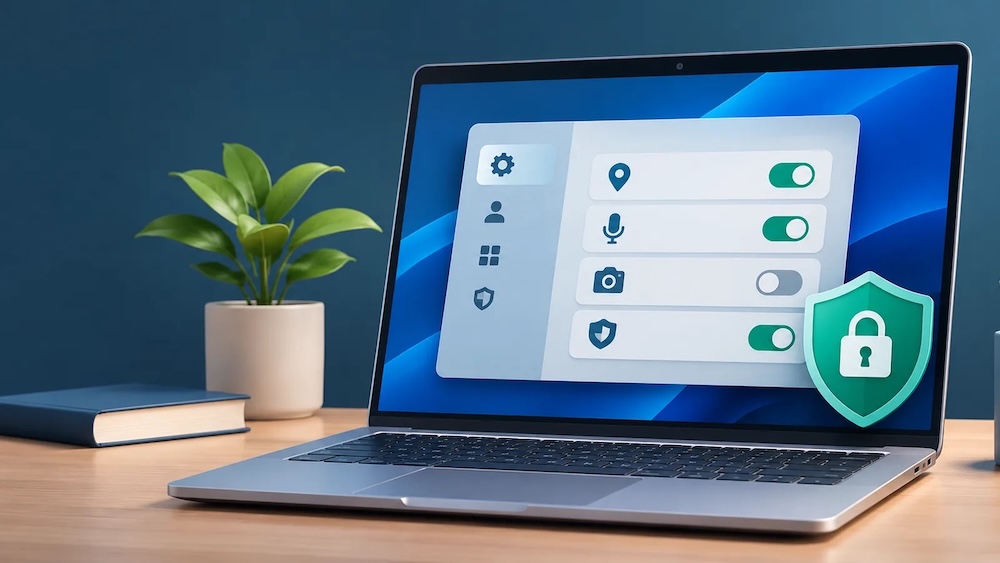
What counts as a privacy leak?
A privacy leak happens when personal information reaches someone you didn’t intend to share it with. Sometimes an app collects more than it needs. A website might learn your approximate location through your internet connection. A shared computer might display part of a private message on its lock screen.
A stolen password or a hacked account can expose far more. Those are security problems too, but they call for stronger account protection rather than another browser setting.
The useful approach is to look at several places where information can escape and deal with each one.
1. Review the permissions you give apps
Apps often need permission to use parts of your computer. A video calling app needs a microphone. A map needs location access. A basic calculator has little reason to ask for either.
Open Settings > Privacy & security in Windows 11. Scroll to App permissions and look through categories such as Contacts, Pictures, Documents, and Location. Select a category to see the controls Windows offers. Turn off access for apps that no longer need it.
For example, a photo editor might need your pictures during an editing session. That doesn’t mean every app on your PC should have access to the same folder.
Keep one limitation in mind. Windows doesn’t show every traditional desktop program in these permission lists. Some desktop apps can access files or hardware through other routes. Check the permissions and privacy policy before installing an unfamiliar program. Remove software you no longer use through Settings > Apps > Installed apps.
2. Limit access to your location
Windows can work out your location using nearby Wi-Fi networks, your internet connection, and other signals. That helps with maps and local weather. It also means location-aware apps may learn more about where you spend your time.
Go to Settings > Privacy & security > Location. Review Location services and the list of apps that can request access. Keep location on for tools that genuinely need it and remove access from the rest.
You can also check whether Windows has saved a default location. A home address entered there may remain available to apps that use the default when Windows cannot find your current position.
Turning off Windows location services does not hide your location from every website. Websites can still estimate a general area from your public internet address. A browser may also have its own location permissions. Review those separately, especially for sites you visited only once.
3. Check your camera and microphone settings
A webcam or microphone doesn’t need to stay available to every app all day. Video meetings, voice calls, and recording tools need access at certain times. Other software usually doesn’t.
In Settings > Privacy & security, open Camera and then Microphone. Check which apps have permission. Remove access from anything you don’t recognize or use. You can also turn off camera or microphone access more broadly and switch it back on before a call.
Windows groups many traditional desktop programs under a shared desktop-app permission. It may not offer a separate switch for each one. Your browser also controls which websites can use your camera and microphone.
Here’s a simple example. You gave a browser game microphone access for one feature months ago. That old permission may still sit in the browser’s site settings. Remove it there rather than assuming the Windows setting covers every website.
A physical webcam cover adds another layer when you don’t need video.
4. Block unwanted browser tracking
Some websites place small files called cookies in your browser. Cookies can keep you signed in and remember a shopping cart. Others help advertising companies connect visits across different sites.
Your browser has controls for this. In Microsoft Edge, open Settings > Privacy, search, and services and review Tracking prevention. The Balanced setting blocks many trackers without causing as many website problems as Strict. You can try Strict and switch back for sites that stop working.
In Google Chrome, go to Settings > Privacy and security > Third-party cookies. Review the option to block them. Clearing old site data can also remove stored information, although it may sign you out of some accounts.
A reputable tracker blocker may catch more tracking requests. Avoid installing several extensions that claim to do the same job. Each extension adds another piece of software with its own permissions.
Private browsing helps keep a session out of your regular local browsing history. It does not make you invisible to websites, employers, or internet providers.
5. Hide your usual IP address with a VPN
Every internet connection uses an IP address. Think of it as the address websites need to send information back to your device. Sites usually see your public IP address when you visit. They can use it to estimate your city or region and identify your internet provider.
A virtual private network, or VPN, sends your internet traffic through a VPN server. Websites then see that server’s public IP address rather than the one your internet provider assigned to your connection. The VPN also encrypts traffic between your computer and the server.
For a Windows PC, a trusted Windows VPN such as Proton VPN offers a dedicated app that you can install and connect to before browsing. This can help on public Wi-Fi and reduce how often websites see your usual IP address.
A VPN isn’t a complete privacy solution. A website can still recognize your account after you sign in. Cookies and browser settings may continue to identify your visits. The VPN provider also handles part of your internet connection, so choosing a service with clear privacy practices matters.
6. Check for IP and DNS leaks
Turning on a VPN isn’t the end of the check. Your browser and computer still need to send internet requests through the expected connection.
One type of request uses DNS, short for Domain Name System. DNS looks up the internet address behind a name such as example.com. A DNS leak occurs when those lookups reach a service outside the route you expected to use with your VPN. That can reveal which website names you request to a separate network provider.
Another browser feature called WebRTC helps with voice calls and video chats. In some setups, it may expose network details beyond the public address you expect a website to see.
To check your setup, connect to the VPN and use a reputable IP and DNS leak-checking tool. Compare the reported public address and DNS provider with what you expect from your VPN connection. A mismatch deserves a closer look at the app’s settings.
Keep your browser and VPN software updated. Avoid random extensions that promise to fix every leak. Some create more privacy concerns than they solve.
7. Cut back on Windows diagnostic data and personalized ads
Windows sends some information to Microsoft to help maintain the system and find problems. You can limit optional diagnostic data without turning off normal security updates.
Open Settings > Privacy & security > Diagnostics & feedback. Review the Send optional diagnostic data setting and turn it off if you don’t want to share extra usage details. Windows still collects required diagnostic information.
Then look for Personalized offers or Recommendations & offers under Privacy & security. The wording depends on your Windows version. These controls cover suggestions and ad personalization, including the advertising ID that some apps use to recognize your activity.
Turning off the advertising ID does not remove all ads. It limits one way apps personalize them.
It’s worth reviewing these settings after a major Windows update. Microsoft sometimes changes the names or placement of privacy controls. The search bar inside Settings can help you find an option without digging through every menu.
8. Look at what your Microsoft account syncs
Signing in with a Microsoft account can make a new PC easier to set up. Your saved preferences may follow you, and cloud storage keeps files available across devices. The same features can copy information beyond the computer where you created it.
Go to Settings > Accounts > Windows backup and review Remember my preferences. Choose which settings you want to carry across devices. Next, check OneDrive’s backup settings and confirm which folders it uploads. Pay close attention to Desktop, Documents, and Pictures.
A personal document saved on your desktop might also exist in your cloud storage. That may be exactly what you want for backups. It shouldn’t come as a surprise.
Review browser sync as well. Microsoft Edge and other browsers can sync bookmarks, passwords, and browsing information when you enable those features. Check the sync categories rather than switching everything on by default.
You can also review data connected to your Microsoft account through its privacy dashboard.
9. Clear clipboard history and watch lock-screen previews
Copying text feels temporary, but Windows can keep several copied items in clipboard history. That may include an email address, a private message, or a password you copied in a hurry.
Press Windows key + V to see whether clipboard history is on and what it holds. Delete sensitive entries. You can also open Settings > System > Clipboard to clear the history and review whether clipboard content syncs across devices. Keep cross-device syncing off unless you actually use it.
Your lock screen deserves attention too. Message previews may show part of a conversation while you’re away from your desk. Go to Settings > System > Notifications and review lock-screen notification options. You can hide sensitive content or stop notifications from appearing there.
Lock your computer with Windows key + L before leaving it, even at home when other people share the space.
10. Be careful with public Wi-Fi and sharing
Coffee shops, hotels, airports, and libraries make it easy to get online. You don’t control the equipment behind those networks, so treat them differently from a trusted home connection.
Windows offers Public and Private network profiles. The Public profile makes your computer less visible to other devices on the same network and limits normal file-sharing features. Open Settings > Network & internet, select your connected Wi-Fi network, and check its Network profile type. Choose Public for networks you don’t trust.
Also look at Settings > System > Nearby sharing. Turn it off when you don’t use it, or limit sharing to your own devices. The Everyone nearby option makes your PC easier for nearby people to find.
Use secure websites and avoid entering sensitive information into pages that show browser security warnings. A VPN can protect traffic between your device and its server, but it cannot turn a fake login page into a safe one.
11. Keep Windows and your apps up to date
Old software can contain security holes that attackers already know how to use. Privacy settings won’t help much after malicious software gains access to your files or browser.
Check Settings > Windows Update and install available security updates. Restart your computer when an update needs it. Keep browsers, video calling tools, and other everyday apps current too.
Windows includes Microsoft Defender Antivirus in the Windows Security app. Open Virus & threat protection and make sure active protection runs. Be cautious with unexpected download links and software that asks you to switch antivirus protection off.
Windows 10 reached the end of standard support on October 14, 2025. Eligible devices may receive additional security fixes through Microsoft’s Extended Security Updates program. Without that coverage, continuing to use Windows 10 increases your risk. Moving to a supported operating system matters more than changing a few privacy switches.
12. Protect your accounts and stored files
A private browser doesn’t help after someone gets into your email account. Strong account security keeps a password leak from turning into access to every connected service.
Use a different password for each important account. A password manager can create and store long passwords so you don’t need to remember them all. Turn on two-factor authentication for email, cloud storage, and other accounts that offer it. This adds another check during sign-in, such as a code or an approval on your phone.
Consider the files stored on your laptop too. Windows offers Device encryption on supported computers. Check Settings > Privacy & security > Device encryption to see whether your PC supports it. Encryption helps protect information on a lost or stolen device. Save the recovery key somewhere secure before making changes.
Use a Windows Hello sign-in option or a strong device password. Combine that with a short automatic screen-lock time to keep casual access to your files under control.
A quick privacy check worth repeating
You don’t need to adjust all twelve areas every week. Start with app permissions, browser tracking, and the accounts that hold your most personal information. Then review the settings that match how you actually use your computer.
Once every few months, check for unfamiliar apps, old website permissions, unwanted cloud syncing, and pending updates. Pay attention after installing new software or connecting your computer to a shared network.
No single tool prevents every kind of privacy leak. The useful changes are the ones that limit access you don’t need and make it easier to notice what your computer shares.