A Beginner’s Guide to Building Your First React App (With Code)
Let’s make something cool together! Today we’re going to build a super fun little app called “Starlight Composer”. It creates twinkling stars in your browser background based on where you click. Sounds awesome, right? But first things first.
So what is React anyway?
Imagine building websites like regular HTML and CSS stuff. That’s fine for simple pages. Now imagine those pages need to change when the user clicks or moves their mouse – that’s where we often use JavaScript (let’s call it JS). Building cool, interactive web apps usually needs a lot of JavaScript code.
React is basically just one part of all this stuff you see on websites these days. Think of it as a really good set of building blocks specifically for making user interfaces (UIs) with JS. It helps manage how the page looks and updates based on actions, like clicks or button presses.
So points to remember:
- React is a JavaScript library.
- It helps you build user interfaces from small parts called components.
- A component is a function that returns HTML‐like code called JSX.
- The browser updates only the parts that change. That makes React fast.
Why should we care about React?
React makes things easier to build complex apps that feel alive. It breaks down the page into smaller parts called components (like building lego sets). Each component can handle its own look and feel (CSS) and do its own tasks using JavaScript.
How It Differs From Plain JS
- In plain JavaScript you select elements and change them by hand.
- With React you describe the state—what the screen should show.
- React handles the DOM updates for you.
React has a great potential to polish your app. You can learn it yourself or find a reliable agency that offers react software development services. In this tutorial, we are going to explain how you can build your first react web app. This will give you an idea whether it’s easier to learn or just get away by hiring someone temporarily to complete your project.
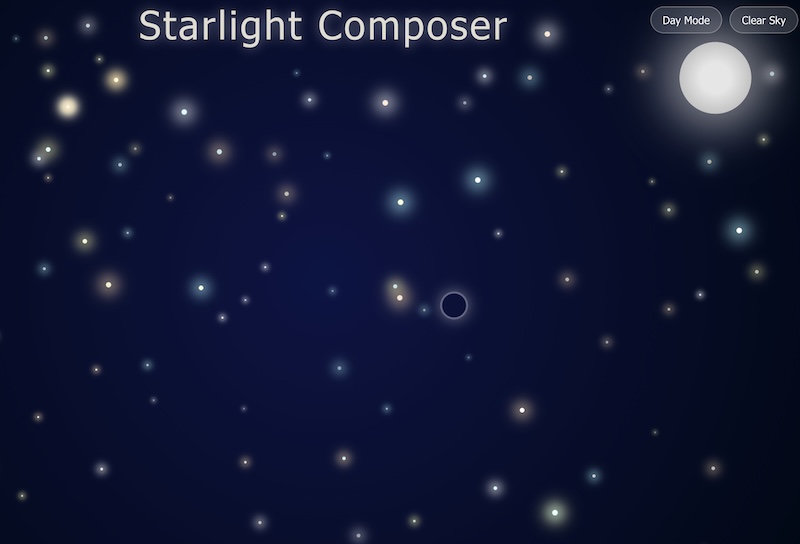
What we are going to make will look like this. Those star kind of things will appear as you click. You can click once for small and click multiple times to make it big.
Let’s build Out Starlight Composer step by step
Our “Starlight Composer” app is all about one main part: App.jsx. We will use React to create a dynamic background with stars and also shows the sun or moon depending on which mode you choose!
First things first: Installing Node.js
You need to get the JavaScript powerhouse called Node.js onto your computer. Go to its official website – it’s pretty straightforward, I promise. There they usually have two versions highlighted: LTS (which stands for Long-Term Support) and Current. Pick the LTS version ’cause that’s the stable, reliable one everyone likes.
When you download it, just run the installer like you would any other program. It handles everything behind the scenes for you – no need to worry about tricky details or hidden setup steps. And guess what? The Node.js installer always includes something really important called npm (Node Package Manager). Think of npm as your package delivery service specifically for Node stuff.
Then, setting up React
Now that you have Node and npm sorted, it’s time to bring in React itself. This is done using a command-line tool – basically, the built-in program on your Mac or the Command Prompt (Windows) or PowerShell (if you’re feeling fancy). Open that up:
On PC (Windows): Open either Command Prompt or PowerShell.
On Mac: Fire up your Terminal.
Go to the folder where you want the create this project, e.g.
cd Desktop/ProjectOn windows it will be changed to (cd Desktop\Project)
1. Now run these commands
npm create vite@latest starlight-composer -- --template react
cd starlight-composer
npm install- Replace the files Vite gives you with the ones we will write.
- Start the dev server:
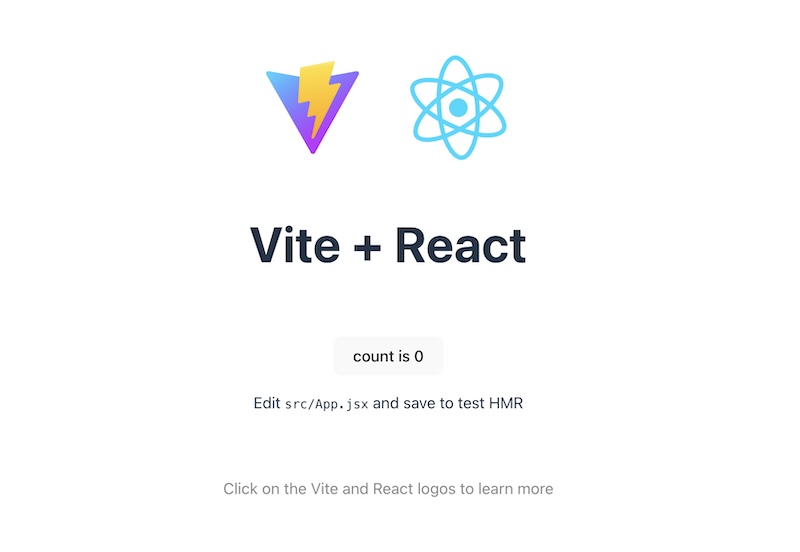
npm run dev- It start the server, probably at http://localhost:5173/ which you can copy from terminal and open in the browser. You will see a simple Vite + React page which may look similar or different.
2. Use Visual Studio or any other to Edit codes
- Open starlight-composer folder in the code editor.
- Inside src folder you will find App.css and App.jsx that we will modify
3. The CSS File, Part 1
Create src/App.css. Paste the first block:
body {
  margin: 0;
  overflow: hidden;
  font-family: 'Segoe UI', Tahoma, sans-serif;
}

.sky {
  position: relative;
  width: 100vw;
  height: 100vh;
  cursor: none;
}bodyremoves scroll bars..skyfills the window and hides the cursor.
4. Night And Day Styles
Add:
.sky.night {
  background: radial-gradient(circle at center, #0c1445, #000814);
}

.sky.day {
  background: linear-gradient(to bottom, #87ceeb, #b0e2ff);
}- Night shows a dark radial glow.
- Day shows a blue gradient.
5. Heading And Stars
h1 {
  text-align: center;
  color: rgba(255, 249, 230, 0.85);
  padding: 15px 0;
  margin: 0;
  font-weight: 300;
  letter-spacing: 3px;
  text-shadow: 0 0 15px rgba(255, 255, 255, 0.5);
  pointer-events: none;
}

.star {
  position: absolute;
  border-radius: 50%;
  transform: translate(-50%, -50%);
  pointer-events: none;
  animation: twinkle infinite ease-in-out;
}- The title floats over the sky.
- Each star is a circle that twinkles.
The twinkle keyframes sit lower in the file. We will add them soon.
6. Cursor And Click Glow
.cursor {
  position: absolute;
  width: 25px;
  height: 25px;
  border: 2px solid rgba(255, 255, 255, 0.8);
  border-radius: 50%;
  transform: translate(-50%, -50%);
  pointer-events: none;
  box-shadow: 0 0 15px #ffffff;
  animation: pulse 2s infinite;
  z-index: 100;
}

.click-glow {
  position: absolute;
  width: 40px;
  height: 40px;
  border-radius: 50%;
  transform: translate(-50%, -50%);
  background: radial-gradient(circle, rgba(255,255,255,0.8) 0%, rgba(255,255,255,0) 70%);
  pointer-events: none;
  animation: expand 0.3s forwards;
  z-index: 90;
}- The fake cursor glows and pulses.
- A quick ring expands when you click.
7. Control Buttons
.controls {
  position: absolute;
  top: 20px;
  right: 20px;
  display: flex;
  gap: 10px;
  z-index: 50;
}

.mode-toggle,
.clear-btn {
  background: rgba(255, 255, 255, 0.15);
  backdrop-filter: blur(10px);
  border: 1px solid rgba(255, 255, 255, 0.3);
  color: white;
  padding: 8px 15px;
  border-radius: 20px;
  cursor: pointer;
  font-size: 14px;
  transition: all 0.3s;
  z-index: 50;
}

.mode-toggle:hover,
.clear-btn:hover {
  background: rgba(255, 255, 255, 0.25);
}

.sky.day .mode-toggle,
.sky.day .clear-btn {
  color: #000;          /* looks black in daylight */
  border-color: rgba(0, 0, 0, 0.2);
  background: rgba(255, 255, 255, 0.7);
}- Buttons sit in the top-right corner.
- In day mode the text turns dark. The user asked for black;
#000gives that look.
8. Sun And Moon
.celestial {
  top: 15% !important;
  position: absolute;
  border-radius: 50%;
  transform: translate(-50%, -50%);
  transition: all 2s ease;
}

.sun {
  background: radial-gradient(circle, #ffd700 30%, #ffa500 100%);
  box-shadow: 0 0 80px 40px rgba(255, 165, 0, 0.6);
}

.moon {
  background: radial-gradient(circle, #e6e6e6 30%, #a9a9a9 100%);
  box-shadow: 0 0 60px 20px rgba(230, 230, 230, 0.6);
}celestialis a base class..sunglows orange;.moonglows silver.
Finish the CSS with mobile tweaks and the keyframes: (We will complete this later witch final code)
@media (max-width: 768px) { /* ... */ }

@keyframes twinkle { /* ... */ }
@keyframes pulse   { /* ... */ }
@keyframes expand  { /* ... */ }
9. The JavaScript File, Part 1
Create src/App.jsx. Begin:
import { useState, useEffect } from 'react';
import './App.css';

function App() {
  const [stars, setStars] = useState([]);
  const [cursor, setCursor] = useState({ x: 0, y: 0 });
  const [clickEffect, setClickEffect] = useState(false);
  const [isDay, setIsDay] = useState(false);
const [celestialBody, setCelestialBody] = useState(null);- React stores data in state.
starsholds every star object.cursortracks mouse position.clickEffecttoggles the ring.isDayswitches the sky.celestialBodydescribes the sun or moon.
10. Listen For Mouse Move
  useEffect(() => {
    const handleMove = (e) => setCursor({ x: e.clientX, y: e.clientY });
    window.addEventListener('mousemove', handleMove);
    return () => window.removeEventListener('mousemove', handleMove);
}, []);useEffectruns after the first render.- We store the listener and remove it on cleanup.
11. Show Sun Or Moon
  useEffect(() => {
    if (isDay) {
      setCelestialBody({
        type: 'sun',
        size: Math.min(window.innerWidth, window.innerHeight) * 0.15
      });
    } else {
      setCelestialBody({
        type: 'moon',
        size: Math.min(window.innerWidth, window.innerHeight) * 0.1
      });
    }
}, [isDay]);- The effect runs when
isDaychanges. - We pick a size that fills 15 % of the short edge for the sun and 10 % for the moon.
12. Make A Star Object
  const createStar = (x, y) => {
    const sizes  = [2, 3, 4, 5, 6];
    const colors = ['#ffffff', '#fefcd7', '#d7fdff', '#ffebd7'];
    const glows  = ['#ffffff', '#ffffa8', '#a8feff', '#ffd8a8'];

    return {
      id: Date.now() + Math.random(),
      x,
      y,
      size: sizes[Math.floor(Math.random() * sizes.length)],
      color: colors[Math.floor(Math.random() * colors.length)],
      glow: glows[Math.floor(Math.random() * glows.length)],
      duration: (Math.random() * 3 + 2).toFixed(1)
    };
};- Each star gets an id, position, size, color, glow, and twinkle speed.
13. Handle Clicks
  const handleSkyClick = (e) => {
    if (!isDay) {
      setClickEffect(true);
      setTimeout(() => setClickEffect(false), 300);
      setStars([...stars, createStar(e.clientX, e.clientY)]);
    }
  };

  const clearSky = (e) => {
    e.stopPropagation();
    setStars([]);
};- At night a click drops a star.
- The ring flashes for 0.3 s.
clearSkywipes the array.
14. Render The Scene
  return (
    <div
      className={`sky ${isDay ? 'day' : 'night'}`}
      onClick={handleSkyClick}
    >
      <div className="controls">
        <button className="mode-toggle" onClick={() => setIsDay(!isDay)}>
          {isDay ? 'Night Mode' : 'Day Mode'}
        </button>
        <button className="clear-btn" onClick={clearSky}>
          Clear Sky
        </button>
      </div>

<h1>Starlight Composer</h1>classNamechanges the CSS theme.- The toggle button flips to black text during daytime, thanks to the
.sky.daystyles.
Continue:
      {!isDay && stars.map(star => (
        <div
          key={star.id}
          className="star"
          style={{
            left: star.x,
            top: star.y,
            width: `${star.size}px`,
            height: `${star.size}px`,
            backgroundColor: star.color,
            boxShadow: `0 0 ${star.size * 3}px ${star.size}px ${star.glow}`,
            animationDuration: `${star.duration}s`
          }}
        />
))}- We skip star render in day mode.
Add the sun or moon, the fake cursor, and the glow:
      {celestialBody && (
        <div
          className={`celestial ${celestialBody.type}`}
          style={{
            width: `${celestialBody.size}px`,
            height: `${celestialBody.size}px`,
            top: '10%',
            left: isDay ? '10%' : '90%'
          }}
        />
      )}

      <div
        className="cursor"
        style={{ left: cursor.x, top: cursor.y }}
      />

      {clickEffect && (
        <div
          className="click-glow"
          style={{ left: cursor.x, top: cursor.y }}
        />
      )}
    </div>
  );
}

export default App;
15. Run And Play
- Save all files.
- The browser refreshes.
- Move the mouse—see the glowing ring.
- Click at night—stars appear and twinkle.
- Click Day Mode—the sky turns blue, the button text looks black, the sun slides in.
- Click Clear Sky—stars disappear.
That is it. You built an interactive scene with just React and CSS.
Complete Code
src/App.css (replace entire existing code with this)
body {
  margin: 0;
  overflow: hidden;
  font-family: 'Segoe UI', Tahoma, sans-serif;
}

.sky {
  position: relative;
  width: 100vw;
  height: 100vh;
  cursor: none;
}

.sky.night {
  background: radial-gradient(circle at center, #0c1445, #000814);
}

.sky.day {
  background: linear-gradient(to bottom, #87ceeb, #b0e2ff);
}

h1 {
  text-align: center;
  color: rgba(255, 249, 230, 0.85);
  padding: 15px 0;
  margin: 0;
  font-weight: 300;
  letter-spacing: 3px;
  text-shadow: 0 0 15px rgba(255, 255, 255, 0.5);
  pointer-events: none;
}

.star {
  position: absolute;
  border-radius: 50%;
  transform: translate(-50%, -50%);
  pointer-events: none;
  animation: twinkle infinite ease-in-out;
}

@keyframes twinkle {
  0%, 100% {
    opacity: 0.6;
    transform: translate(-50%, -50%) scale(0.8);
  }
  50% {
    opacity: 1;
    transform: translate(-50%, -50%) scale(1.2);
  }
}

.cursor {
  position: absolute;
  width: 25px;
  height: 25px;
  border: 2px solid rgba(255, 255, 255, 0.8);
  border-radius: 50%;
  transform: translate(-50%, -50%);
  pointer-events: none;
  box-shadow: 0 0 15px #ffffff;
  animation: pulse 2s infinite;
  z-index: 100;
}

@keyframes pulse {
  0% {
    transform: translate(-50%, -50%) scale(1);
    opacity: 0.7;
  }
  50% {
    transform: translate(-50%, -50%) scale(1.3);
    opacity: 0.4;
  }
  100% {
    transform: translate(-50%, -50%) scale(1);
    opacity: 0.7;
  }
}

.click-glow {
  position: absolute;
  width: 40px;
  height: 40px;
  border-radius: 50%;
  transform: translate(-50%, -50%);
  background: radial-gradient(circle, rgba(255,255,255,0.8) 0%, rgba(255,255,255,0) 70%);
  pointer-events: none;
  animation: expand 0.3s forwards;
  z-index: 90;
}

@keyframes expand {
  to {
    width: 120px;
    height: 120px;
    opacity: 0;
  }
}

.controls {
  position: absolute;
  top: 20px;
  right: 20px;
  display: flex;
  gap: 10px;
  z-index: 50;
}

.mode-toggle,
.clear-btn {
  background: rgba(255, 255, 255, 0.15);
  backdrop-filter: blur(10px);
  border: 1px solid rgba(255, 255, 255, 0.3);
  color: white;
  padding: 8px 15px;
  border-radius: 20px;
  cursor: pointer;
  font-size: 14px;
  transition: all 0.3s;
  z-index: 50;
}

.mode-toggle:hover,
.clear-btn:hover {
  background: rgba(255, 255, 255, 0.25);
}

.sky.day .mode-toggle,
.sky.day .clear-btn {
  color: #000;
  border-color: rgba(0, 0, 0, 0.2);
  background: rgba(255, 255, 255, 0.7);
}

.celestial {
  top: 15% !important;
  position: absolute;
  border-radius: 50%;
  transform: translate(-50%, -50%);
  transition: all 2s ease;
}

.sun {
  background: radial-gradient(circle, #ffd700 30%, #ffa500 100%);
  box-shadow: 0 0 80px 40px rgba(255, 165, 0, 0.6);
}

.moon {
  background: radial-gradient(circle, #e6e6e6 30%, #a9a9a9 100%);
  box-shadow: 0 0 60px 20px rgba(230, 230, 230, 0.6);
}

@media (max-width: 768px) {
  .controls {
    top: 10px;
    right: 10px;
    flex-direction: column;
  }

  .celestial {
    top: 20% !important;
    left: 90% !important;
  }

  .sky.day .celestial {
    left: 10% !important;
  }
}
src/App.jsx
import { useState, useEffect } from 'react';
import './App.css';

function App() {
  const [stars, setStars] = useState([]);
  const [cursor, setCursor] = useState({ x: 0, y: 0 });
  const [clickEffect, setClickEffect] = useState(false);
  const [isDay, setIsDay] = useState(false);
  const [celestialBody, setCelestialBody] = useState(null);

  useEffect(() => {
    const handleMove = (e) => setCursor({ x: e.clientX, y: e.clientY });
    window.addEventListener('mousemove', handleMove);
    return () => window.removeEventListener('mousemove', handleMove);
  }, []);

  useEffect(() => {
    if (isDay) {
      setCelestialBody({
        type: 'sun',
        size: Math.min(window.innerWidth, window.innerHeight) * 0.15
      });
    } else {
      setCelestialBody({
        type: 'moon',
        size: Math.min(window.innerWidth, window.innerHeight) * 0.1
      });
    }
  }, [isDay]);

  const createStar = (x, y) => {
    const sizes = [2, 3, 4, 5, 6];
    const colors = ['#ffffff', '#fefcd7', '#d7fdff', '#ffebd7'];
    const glows = ['#ffffff', '#ffffa8', '#a8feff', '#ffd8a8'];

    return {
      id: Date.now() + Math.random(),
      x,
      y,
      size: sizes[Math.floor(Math.random() * sizes.length)],
      color: colors[Math.floor(Math.random() * colors.length)],
      glow: glows[Math.floor(Math.random() * glows.length)],
      duration: (Math.random() * 3 + 2).toFixed(1)
    };
  };

  const handleSkyClick = (e) => {
    if (!isDay) {
      setClickEffect(true);
      setTimeout(() => setClickEffect(false), 300);
      setStars([...stars, createStar(e.clientX, e.clientY)]);
    }
  };

  const clearSky = (e) => {
    e.stopPropagation();
    setStars([]);
  };

  return (
    <div
      className={`sky ${isDay ? 'day' : 'night'}`}
      onClick={handleSkyClick}
    >
      <div className="controls">
        <button className="mode-toggle" onClick={() => setIsDay(!isDay)}>
          {isDay ? 'Night Mode' : 'Day Mode'}
        </button>
        <button className="clear-btn" onClick={clearSky}>
          Clear Sky
        </button>
      </div>

      <h1>Starlight Composer</h1>

      {!isDay &&
        stars.map((star) => (
          <div
            key={star.id}
            className="star"
            style={{
              left: star.x,
              top: star.y,
              width: `${star.size}px`,
              height: `${star.size}px`,
              backgroundColor: star.color,
              boxShadow: `0 0 ${star.size * 3}px ${star.size}px ${star.glow}`,
              animationDuration: `${star.duration}s`
            }}
          />
        ))}

      {celestialBody && (
        <div
          className={`celestial ${celestialBody.type}`}
          style={{
            width: `${celestialBody.size}px`,
            height: `${celestialBody.size}px`,
            top: '10%',
            left: isDay ? '10%' : '90%'
          }}
        />
      )}

      <div
        className="cursor"
        style={{ left: cursor.x, top: cursor.y }}
      />

      {clickEffect && (
        <div
          className="click-glow"
          style={{ left: cursor.x, top: cursor.y }}
        />
      )}
    </div>
  );
}

export default App;
Save the codes, reload the webpage, start clicking on the screen in Night Mode to see the twinkling stars.
Enjoy your first React creation!