How to Use Cloudflare for DNS only (Without CDN)
Cloudflare is well known for its CDN that offers unlimited bandwidth even to the free-tier users. However, being free tier limits you to use a limited number of features that might not be suitable for all webmasters. If you are happy to use with those limitations, go for it. You can simply ignore the rest of the article. However, if you just want to take advantage of its DNS along with added DNS Security only (without using CDN), you should continue reading.
Why Cloudflare DNS when you already have one with your hosting provider?
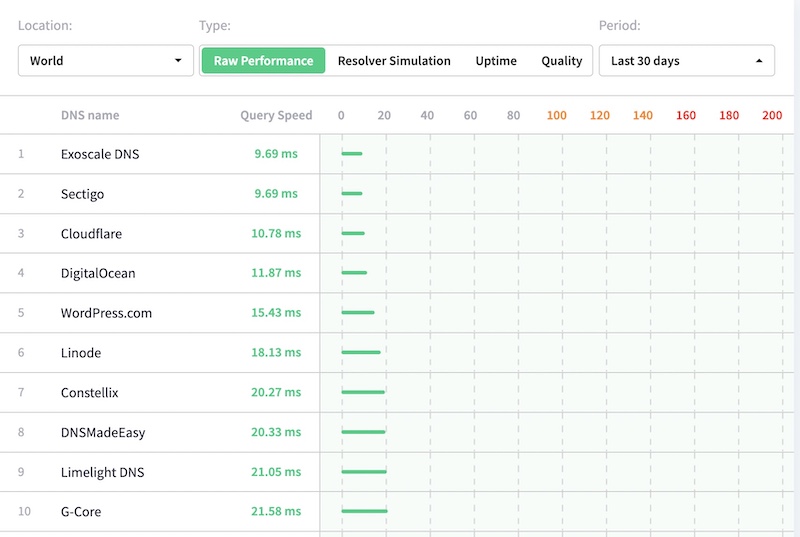
Cloudflare DNS respond much quicker than many other DNS. If we talk about the RAW Performance, then Cloudflare DNS is among the top 3. Here are the top 10 DNS service providers according to DNSPerf.
Let’s have a look at latency time. I have tested 2 domains: 1 is using Cloudflare DNS and another Dreamhost. You can also benchmark your DNS Latency on DNSPerf.
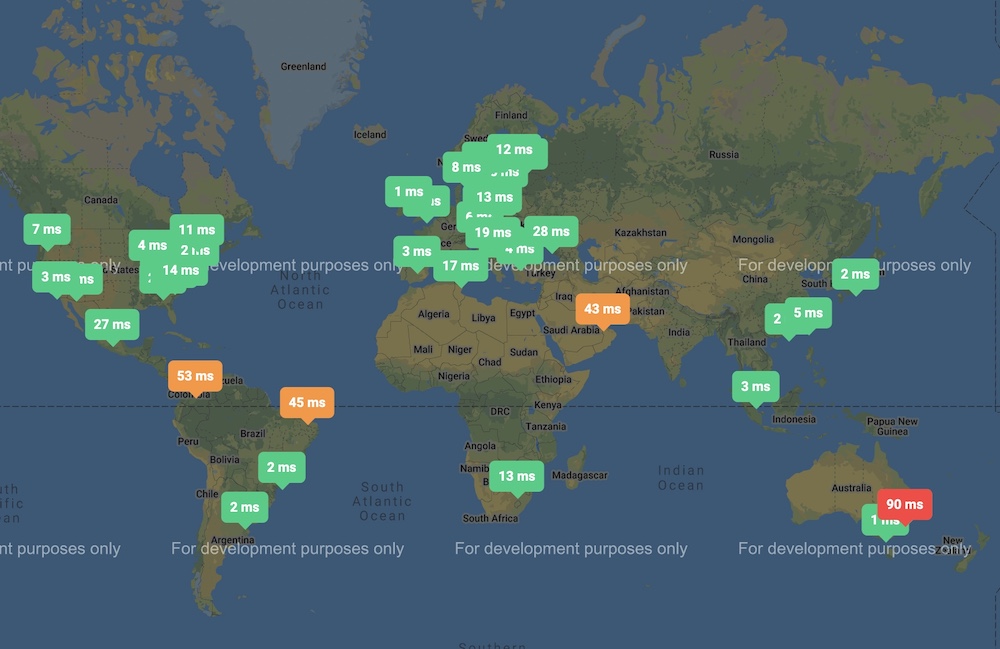
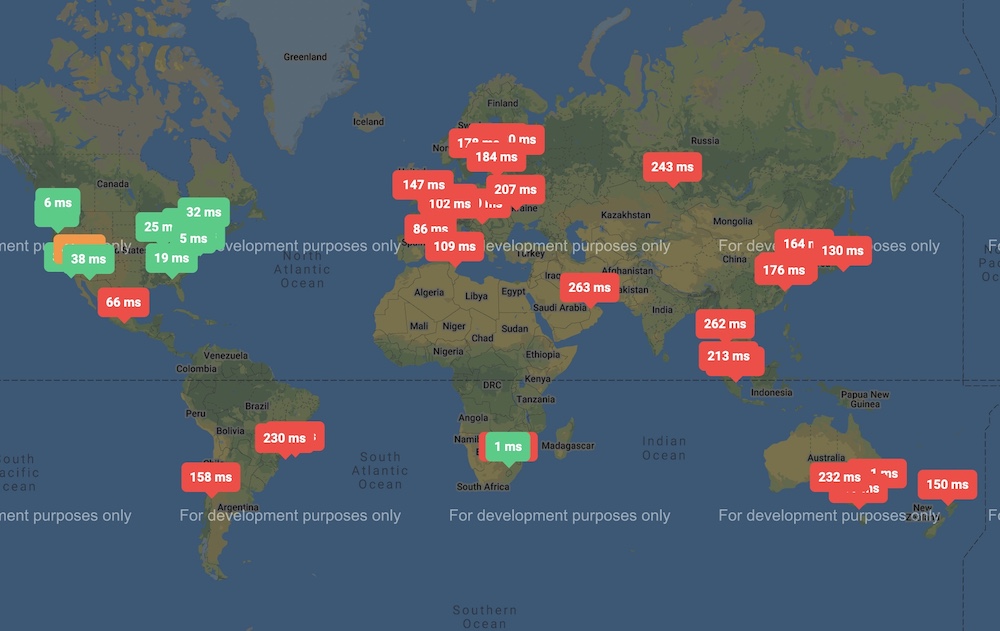
So you see the difference. Apart from those latency differences, Dreamhost doesn’t have the option to add an additional layer of security to DNS, known as DNSSEC. If you didn’t know about this, let me explain quickly. DNSSEC helps to authenticate DNS data on the origin level, protects your DNS Records, e.g. MX, TXT, etc.. DNSSEC is not supported by many hosting providers, so you have to check with yours if they support it.
How to use Cloudflare as DNS Only Service?
Note: Doing this will disable Cloudflare CDN as well as WAF and other services. Your data will be served from origin or other CDN providers if you use one (except Cloudflare).
- Add your website normall you do. There is no special things to do here.
- After you add, Cloudflare shows you DNS info that you must update. So go to your domain registrar website and update DNS record.
- Now come back to Cloudflare and click on the Website option, then click on the website you have added.
- Hit the DNS option and now you can see DNS Records.
- Click on the Edit option for each DNS that shows Proxy Status “ON”. Disable Proxy for all of them as shown in the screenshot below.

- Save the record.
That’s it. Now you are using DNS only.
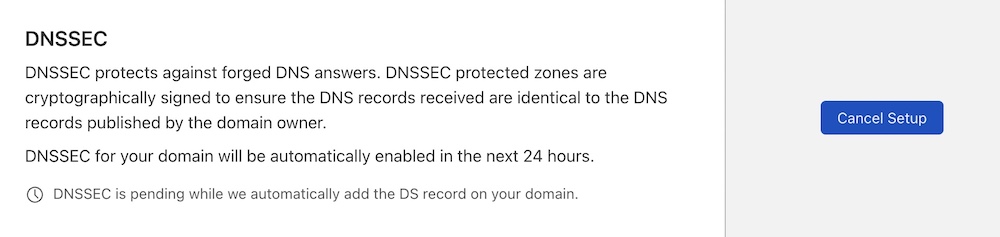
How to enable DNSSEC on Cloudflare
- Scroll down on the DNS page and enable DNSSEC. It may take up to 24 hrs to complete this action. But, don’t worry, your site will keep running normally while it is done.
Did you there is a quick way to use DNS only feature?
Just add your website to Cloudflare and update the DNS record for the domain. Now pause Cloudflare. That’s it, you won’t have to disable Proxy for each DNS record. However, disabling proxy is a much safer way if you are managing more than 1 site and want to keep it enabled for some and disable for others. It will not cause any confusion.