How to Import LUTs in DaVinci Resolve (Super Simple Guide)
If you want your video to look clean, cinematic, and consistent, LUTs make that fast. The good news: adding them to DaVinci Resolve is easy. Here’s a clear, no-nonsense guide you can follow right now.
What is a LUT (in plain English)?
A LUT is a ready-made color “look.” You drop it on your clip, and it shifts colors and contrast to a new style.
- Technical LUTs: convert flat/log footage (like Sony S-Log3) to normal Rec.709.
- Creative LUTs: add style (cinematic, warm, film-like).
You can use both: convert first, then style.
Part 1 — Install / Import LUTs into DaVinci Resolve
Do this once. After that, your LUTs will be available in all projects.
- Open DaVinci Resolve.
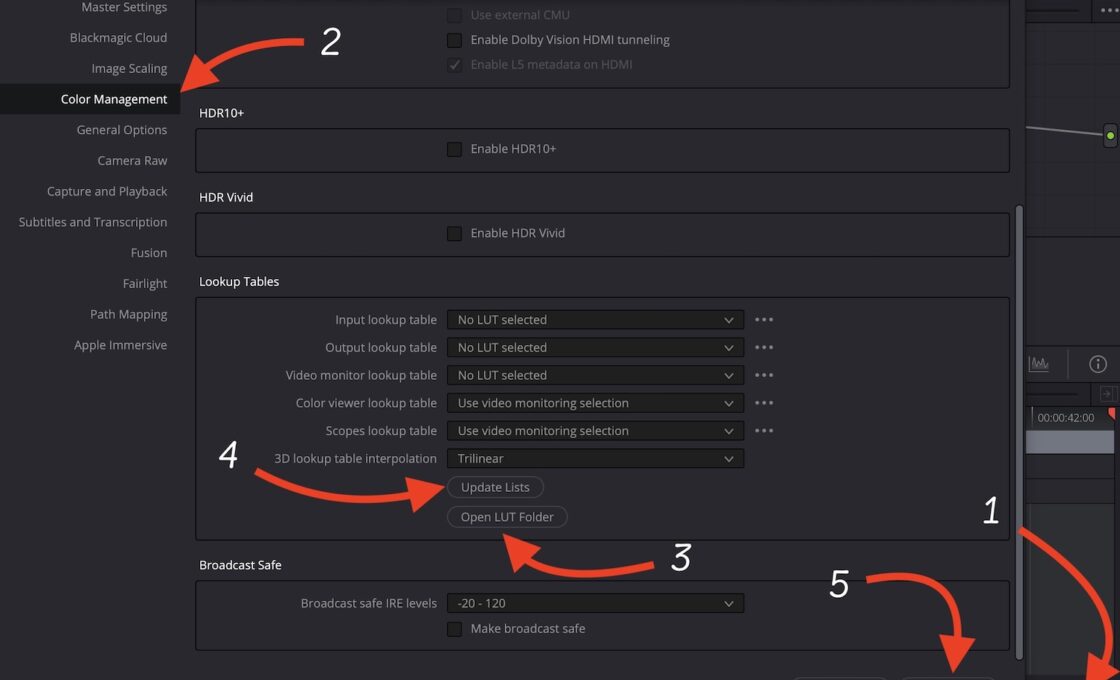
- Click the gear icon at the bottom right (Project Settings).
- Go to Color Management.
- Find the Lookup Tables (LUTs) section.
- Click Open LUT Folder. A system folder will pop up.
- Mac path:
/Library/Application Support/Blackmagic Design/DaVinci Resolve/LUT/ - Windows path:
C:\ProgramData\Blackmagic Design\DaVinci Resolve\Support\LUT\
- Mac path:
- Drag your LUT files (usually
.cube) or full LUT folders into this LUT folder. It’s recommended to create a folder with any name and put all your LUTs files inside that folder.- Tip: keep things tidy. Create folders like
Sony_SLog3,Creative_Cinematic, etc.
- Tip: keep things tidy. Create folders like
- Back in Resolve, click Update Lists (or Refresh LUTs).
- Click Save.
That’s it. Your LUTs are now installed.
Verifying the Imported Files
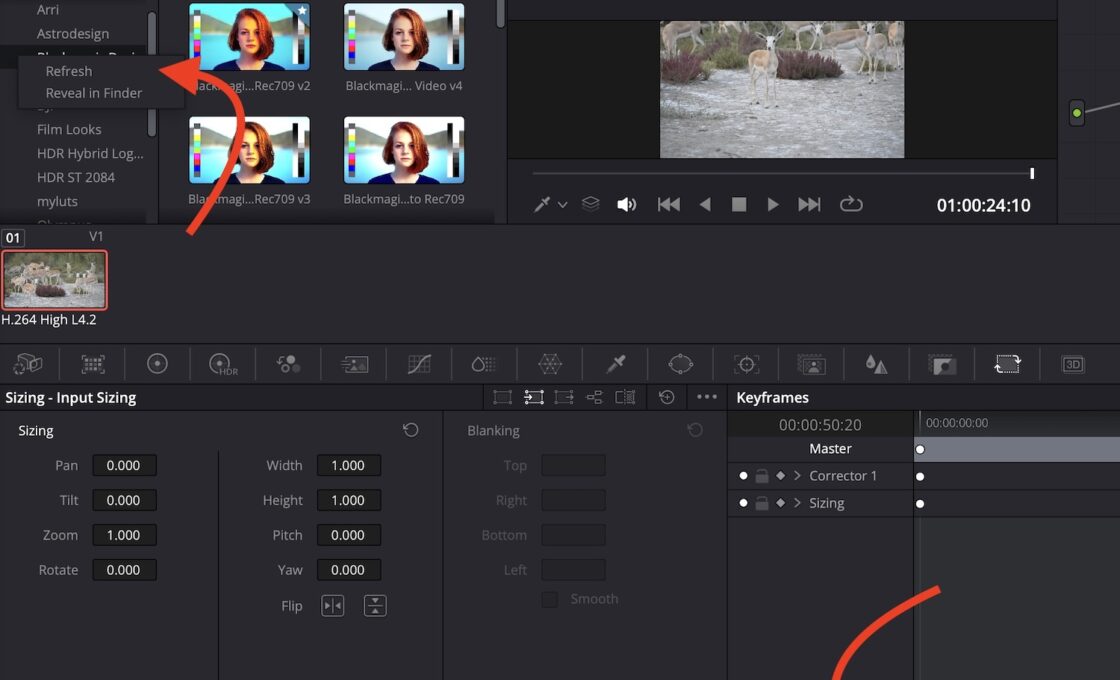
- At the bottom, click on Color icon/option.
- Then Select LUTs option/icon
- Your added LUTs should already show there. If it doesn’t right click and hit the Refresh option.
Final Thoughts
Importing and using LUTs in DaVinci Resolve is simple: load them once, refresh, and you’re ready. Start with a technical transform (if you shot log), blend in a creative LUT lightly, then adjust exposure and color to taste. Your videos will look consistent, cinematic, and professional—without extra fuss.