How to Unblock Your IP When the Defender Plugin Locks You Out of Your WordPress Admin Dashboard
Have you ever found yourself locked out of your WordPress admin dashboard because of the Defender plugin? It happens after three incorrect password attempts. But don’t fret! This guide will walk you through unblocking your IP and getting back in quickly and easily.
What Happens When You Get Locked Out
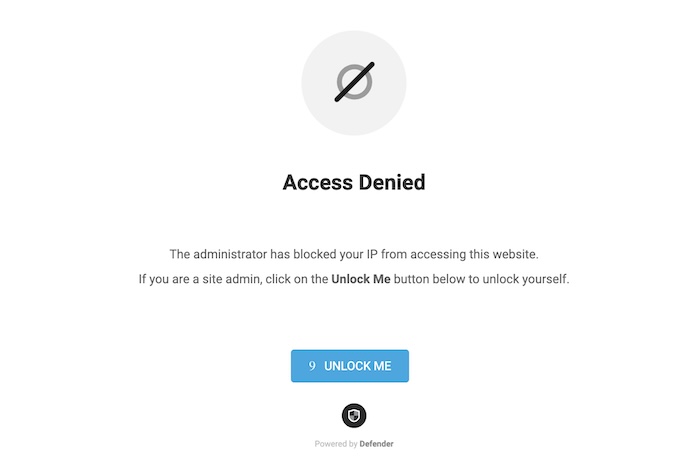
Defender is a security plugin for WordPress, designed to lock you out after three failed password attempts. When this happens, you might see a screen with an “Unlock Me” option with this message.
The administrator has blocked your IP from accessing this website. If you are a site admin, click on the Unlock Me button below to unlock yourself.
Using the “Unlock Me” Option
- Click on “Unlock Me”: You’ll find this option on the lockout screen.
- Enter Your Email or Username: Use the email or username associated with your WordPress account.
- Check Your Email: If the email or username matches, you’ll receive an email with instructions to unlock your account.
If You Don’t Receive an Email
Sometimes, the email might not come through. Don’t worry, there’s an alternative solution!
Finding Your IP Addresses
You’ll need both your IPv4 and IPv6 addresses. You can find them on various online tools or websites designed for this purpose. For example, you can visit this IP and Location Detector Page to get your IPs.
Editing the functions.php File
- Find Your Theme’s functions.php File: Navigate to your domain’s root folder, then wp-content, then themes. Locate the folder for your theme. Each theme has its own functions.php file. If you’re using a child theme, make sure to edit the functions.php file within the child theme’s folder.If you’re unsure which theme you’re using, try a WordPress Theme Detector tool.
- Backup Your functions.php File: Download the functions.php file before making any changes. This ensures you have a backup if anything goes wrong.
- Add the Code: Open the functions.php file and add the following code. Replace Your_IPV4 and Your_IPV6 with your actual IP addresses.
For IPV4:
add_filter( 'ip_lockout_default_whitelist_ip', function ( $ips ) {
  $ip    = 'Your_IPV4';
  $ips[] = $ip;
  return $ips;
} );
For IPv6: If enabled, make sure that you add both codes (IPV4 and IP6). You can add them together.
add_filter( 'ip_lockout_default_whitelist_ip', function ( $ips ) {
  $ip    = 'Your_IPV6';
  $ips[] = $ip;
  return $ips;
} );- Save the File and Test: Save the functions.php file and try to load your site. If the site breaks, move the code to a different part of the functions.php file and test again.
Tips for Safety
- Use a Child Theme: It’s safer to edit the functions.php file in a child theme.
- Have a Backup: Always keep a backup of your functions.php file.
Conclusion
After saving the functions.php file and confirming that your site loads properly, you should regain access to the WordPress admin dashboard. The Defender lockout screen will be a thing of the past. Now, you’re equipped to unblock your IP with ease!
If there is still a problem or you need professional help, send an email to me@zoheb.org.