A Simple Way to Remove People from Photos on iPhone

Crowded places make great memories, but messy pictures. A perfect cityscape can be spoiled by a stranger walking through the frame; a family snapshot can lose focus because someone stepped behind your subject at the wrong second. The good news: the weapon against this problem is already in your pocket.
In this article, we explain how to remove a person from a photo on an iPhone. We provide the core removal workflow with additional tips on making your modifications seamless and invisible.
Pick the Right Tool for the Job
Learning how to remove people from photos on an iPhone highly depends on the tools you choose. Select the photo editing app for iPhone according to your goals, skill level, and budget.
AI-assisted editors like Luminar Mobile can dramatically reduce your effort without compromising the believability of your results. These apps offer one-tap object removal, selective refinements, and quick tone matching within a few taps.
In the next section, we provide clear, beginner-friendly instructions on object removal with Luminar Mobile.
How to Erase People from Pictures on an iPhone: Step-by-Step
Luminar Mobile is designed to make object removal simple. The process relies on the Erase Tool. Find the object you want to remove, mark it, and replace it with the surrounding details for a natural look. Follow a simple sequence to edit people out of photos on an iPhone. It ensures fast and undetectable modifications.
1. Prepare Your Photo

Open your image in Luminar Mobile. Before you start erasing, use the Crop Tool to straighten or trim the photo. It helps you avoid wasting time fixing parts of the picture you won’t keep.
2. Zoom in for Accuracy
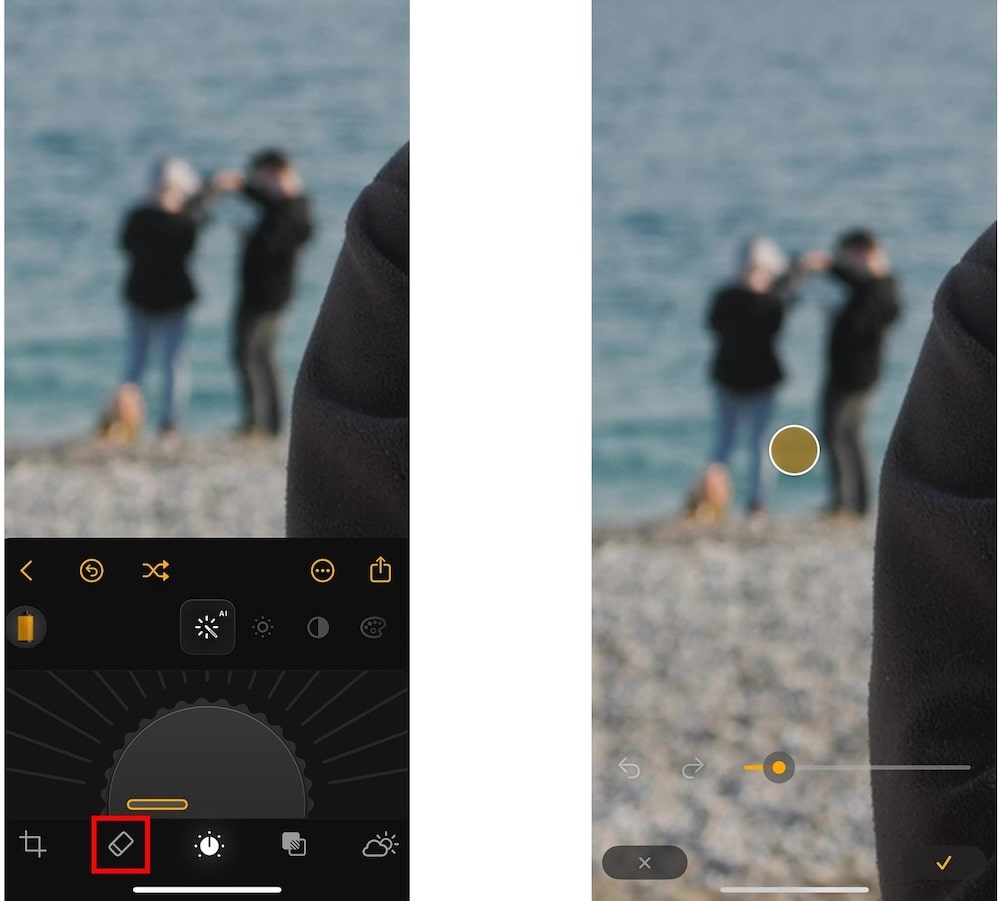
Pinch the screen to zoom in closely (200–300%). Then, use the Erase Tool brush to carefully paint over the object you want to remove. Small, short strokes usually give the best results, because the app can better read nearby textures like grass, walls, or sky.
3. Erase in Logical Steps
Begin with simple areas because they are easiest to fill in. Work slowly in the background with busier textures like brick or tiles. If a first pass is imperfect, apply the brush again to refine the area.
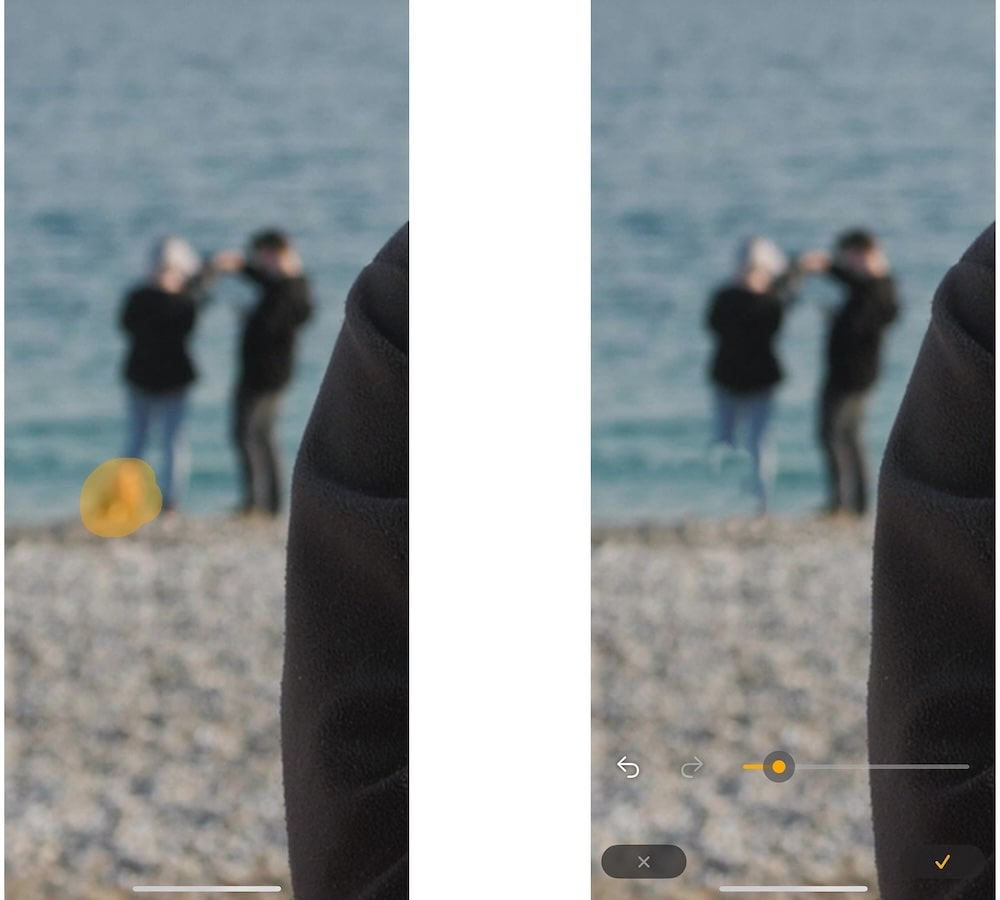
4. Start Small, Then Go Bigger
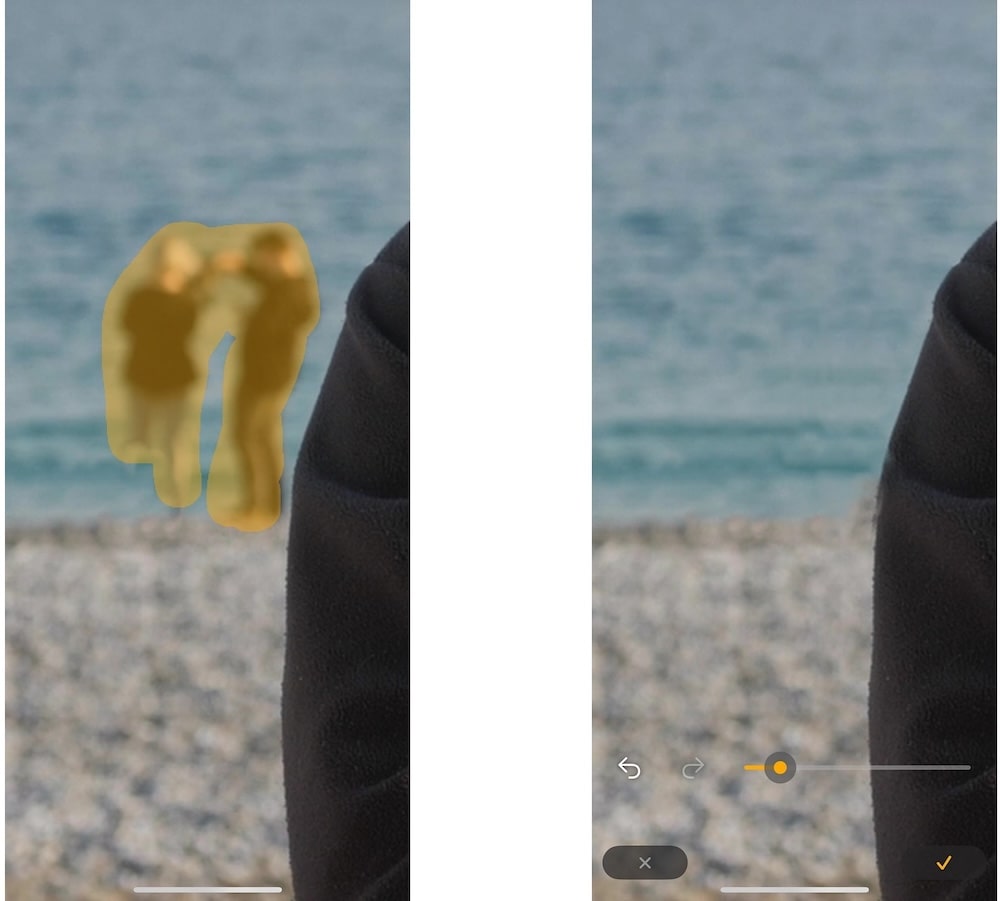
Smaller objects like accidental photobombers should be erased first. Once those are gone, move on to larger distractions like crowds of tourists next to an architectural landmark. Follow the outline of the person you want to erase to avoid blurring nearby details.
5. Check and Adjust
When the object disappears, zoom out to see the full photo. If you notice repeating patterns or soft spots, lightly run the Erase Tool over the area again. You can also adjust the overall look with tools like Develop (for brightness and contrast) or Details (to restore sharpness).
Refinement Tips for Realistic Results
When an object disappears in Luminar Mobile, your work is not quite done. The goal is to ensure no one can tell it was ever there. Here is how to blend the fix so it looks seamless:
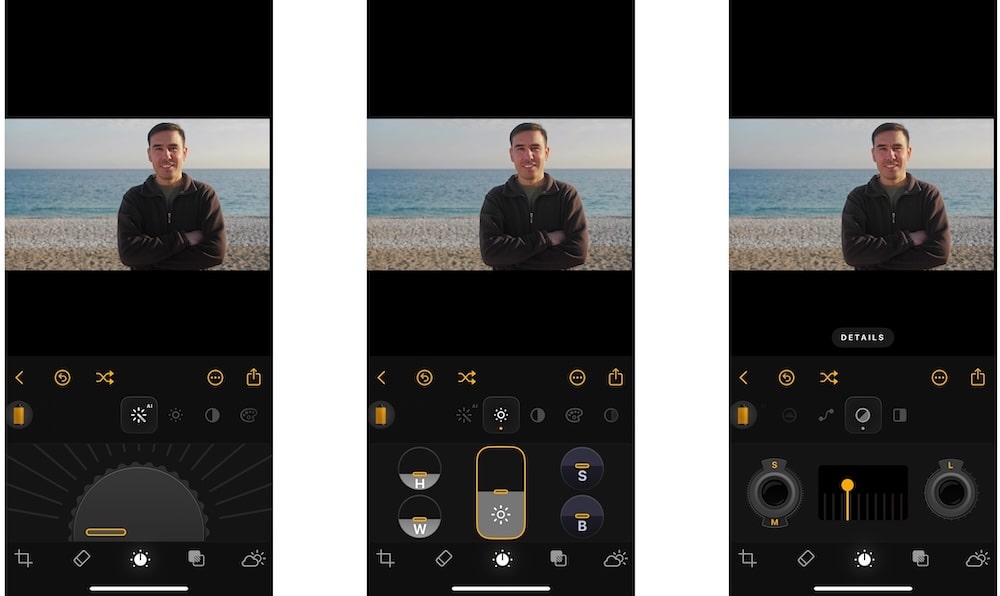
- Match contrast and brightness. Use the Develop Tool to adjust exposure, highlights, and shadows in the repaired area. Make sure it’s not darker or lighter than the rest of the photo. Pay attention to midtones, since they create depth and texture.
- Fix color inconsistencies. If the patch looks warmer or cooler, adjust it with the white balance slider. For color casts that don’t go away, gently reduce saturation. In mixed lighting, a light touch with Curves can balance tones across the frame.
- Restore texture and detail. If the erased spot feels too smooth, add sharpness with the Details Tool or boost micro-contrast with StructureAI. For repeating surfaces like bricks or fabric, tidy up with the Erase Tool in small strokes to keep patterns natural.
- Finish with global edits. Apply a gentle curve, a subtle vignette, or crop to guide the viewer’s eye and hide tiny flaws. Always check your edit at 100% zoom for fine details and at fit-to-screen for overall balance.
Conclusion
Removing people from iPhone photos is simpler than it looks: make small, careful passes and blend the fix so it disappears. With a clear sequence and a bit of practice, you will clean up distractions in minutes and keep attention where it belongs: on your subject and the story you intended to tell.