How to Compress Images on Mac (Reduce Image Size)
Please Subscribe to our YouTube Channel
Compressing Images are very important if you are a blogger or someone whose job includes dealing with lots of images. Uploading large-sized images on the server consume more bandwidth and it also becomes painful for the visitors as the webpage takes quite long to load. In the same way, sending compressed images via email go easy on the receiver as he/she can quickly download the file. Enough of the talking, let’s find out what we can do.
Step 1: Convert the Image on Mac and Adjust Quality (If needed)
Note: Ignore this step if you are dealing with a Transparent or animated image.
An image in .gif and .png format is quite large in size (usually more than double of the size of a .jepg image). If you are not handling an animated image or an image that needs to keep its transparency, then you can safely convert it into .jpeg that usually doesn’t make any difference in the quality. Always keep the copy of the image when you are experimenting for the first time.
How to convert .gif or .png on Mac without any third-party app.
- Double click the image in finder to open with Mac’s Preview app. If you face any issue, you can also right-click –> select open with –> select preview app.
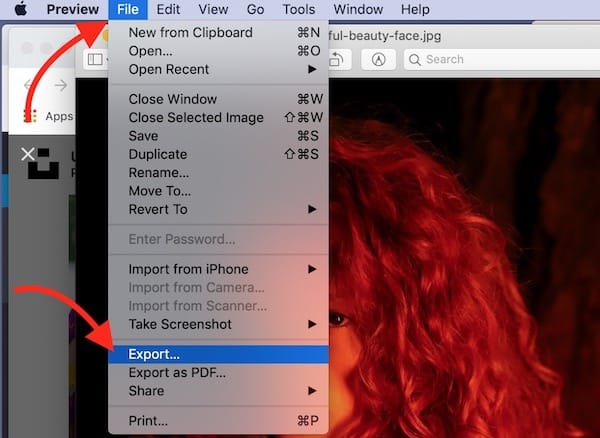
- When the image is opened with the Preview app, select File option from Menu and click the Export option
- Now select JPEG and adjust the quality bar. It is never set to the best quality as it may even make the image larger than the actual size. You have better either keep it as it is or go for a little lower quality unless you really need a very high-quality image. Whatever you do, it cannot make it better than the actual image.
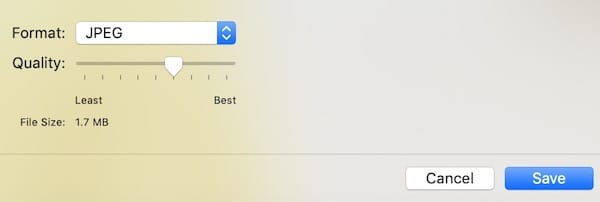
- Finally hit the Save button to convert the image on Mac.
Step 2: Adjust Dimension and Resolution of the Image on Mac (If Needed)
If you don’t need the image in high resolution, you can adjust the resolution easily following these steps.
- Open the image with Mac’s Default Preview app that you can do by just double-clicking on the image or use right-click and select Open with –> Preview.
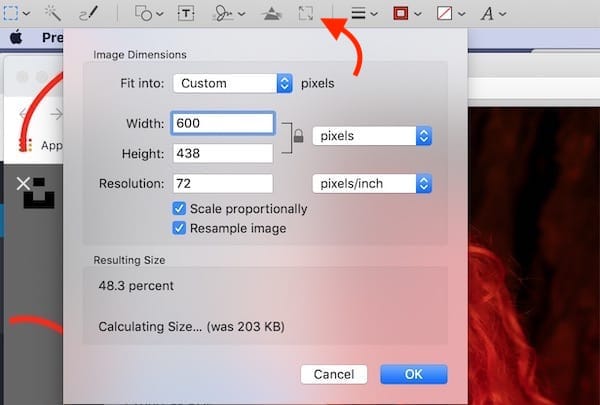
- Click on the small square icon highlighted in the image above and it will give you the option to adjust dimension and resolution. I always keep the resolution 72 to upload on my blog and dimension according to the need.
Final Step: The Best Way to Compress: Use ImageOptim
You can safely skip the first 2 steps if you don’t want to convert an image or change its dimension and resolution. You can also play with options to find out what fits the best for you.
ImageOptim is an OpenSource free application that you can download for Mac. It’s very light in weight and runs smoothly. The app compresses all type of images. So if you have animated Gifs, PNGs, or even transparent image, ImageOptim will compress them.
- Download ImageOptim free app on Mac, move the app to Application folder as you usually do on Mac.
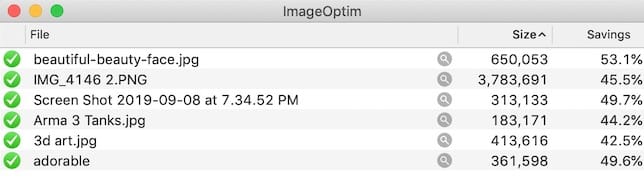
- Launch the app and drag any image and drop to ImageOptim app and it would show how much it decreased it in size.
- You may not be very impressive like I wasn’t earlier. So click on the Settings icon and then select the Quality tab, and check the box that says “Enable Lossy Minification.”
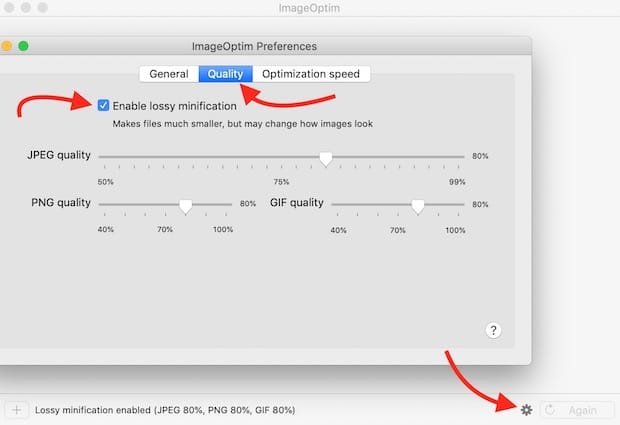
- Now drag the image to the app and see its magic. However, please remember that it compresses the original image and minifies it. So if you are still testing or at your learning phase, always keep the original copy saved in a folder and make a copy of those images to test.